I had to give it a try.
This is potentially life-threatening stuff!!!
I ought not to have performed the work myself, as I am untrained. This is only a documentary of my foolhardy behavior.
Hire a professional.
---
Carrier-brand heat pumps use wiring colors that appear to be outside the industry standard, so I wanted to share my experience in case it might help someone.
(Kinda funny, considering Mr. Carrier is credited as a founder of modern air-conditioning. Also there have been murmurs of his work elongating Congressional meetings that the Founding Fathers did not foresee happening in humid Washington, D.C.)
The photographs and video are of an old-ish (maybe 2002?) heat pump that has seen some non-standard replacement parts in its day. The contactor is a replacement part and, I think, mislabeled (it appears to me that L1 / L2 (thus, also, T1 / T2) were switched according to my limited understanding of the schematics and wiring diagram provided by Carrier Corporation).
The fan motor was replaced. The technician apparently installed a secondary run-capacitor for it, rather than replacing the 3-pole run-capacitor. I don't know why he chose to do so, but as our capacitors tend to degrade below spec every 2-3 years (we have near-max-allowable voltage from the mains, plus we're in a lightning-prone area), it does save us some money to replace the little guy for $6 vs. $20+ for a new 3-pole capacitor.
1 Thermostat turned to OFF
2 Heat Pump Circuit-Breaker turned to OFF
3 Heat Pump Power Physically Broken
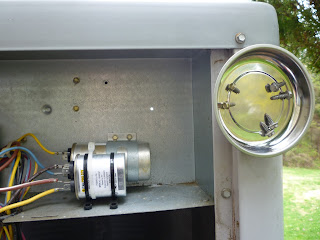
4 Rear-View of Carrier-Provided Extra Mounting Screws
5 Carrier Label
6 Aftermarket Possibly-Mislabeled Contactor
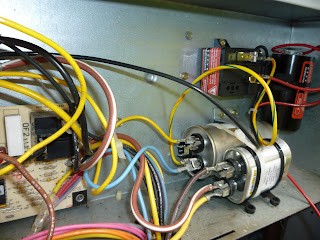
7 Heat Pump Before Start-Capacitor Installation
Please note that in that photograph the blue wire is incorrectly connected to "C" and the yellow wire to "HERM" on the larger capacitor (it ran fine that way for quite a few years, but as following photographs will show, I put it back to normal wiring, that-is, blue-to-"HERM" and yellow-to-"C" for posterity's sake).
9 Two Screws Removed for Mounting the Relay and the Start-Capacitor
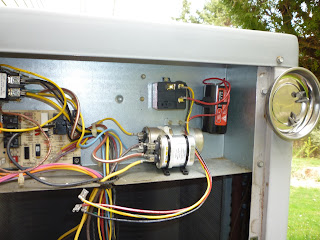
10 Relay Mounted
11 Start-Capacitor Finagling
(Please notice the small foam adhesive pad I stuck on the Start-Capacitor. As the heat-pump did not offer a convenient spot upon which to rest the the Start-Capacitor, I was concerned that vibrations might cause it to slip out of the mounting strap.)
12 More Finagling of the Start-Capacitor
13 Even More Finagling of the Start-Capacitor
14 Start-Capacitor Strapped-In and Screwed-In
14.2 Start-Capacitor Strapped-In and Screwed-In / alternative view
15 Stripey Wire to the "HERM" terminal of the compressor's Run-Capacitor
16 Red Wire from the Start-Capacitor to the "C" terminal of the compressor's Run-Capacitor
17 Black Wire from the Start-Capacitor Relay to the Black Wires Terminal on Contactor
Sorry I don't have a clamp-on amp-meter. I do think it's running more quietly now.


